How to use automotive touch up p...
• Written by nickadam4
How to use automotive touch up paint
Applying automotive touch-up paint is a practical solution for fixing minor scratches and chips, helping to restore your car’s appearance and protect it from rust. Here’s a comprehensive guide on how to use touch-up paint effectively:
Materials Needed:
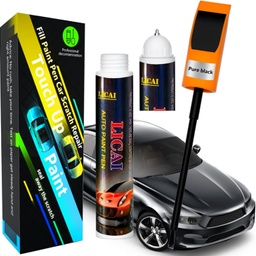
Touch-up paint matching your car's color
Primer (if the scratch is deep)
Clear coat
Fine-grit sandpaper (1500-2000 grit)
Rubbing alcohol or automotive cleaner
Microfiber cloths
Small paintbrush, toothpick, or paint pen
Masking tape (optional)
Preparation:
Clean the Area: Start by washing the damaged area thoroughly with soap and water to remove any dirt, grease, or wax. Rinse well and dry with a microfiber cloth.
Sand the Scratch or Chip: Lightly sand the scratch or chip with fine-grit sandpaper to smooth out any rough edges and create a suitable surface for the paint to adhere to. Wipe away any sanding dust with a microfiber cloth.
Degrease: Clean the sanded area with rubbing alcohol or an automotive cleaner to remove any remaining oils or debris, ensuring a clean surface. Let it dry completely.
Application:
Apply Primer (if needed): If the scratch or chip has penetrated down to the metal, apply a thin layer of primer using a small brush or toothpick. Allow it to dry according to the manufacturer's instructions.
Apply Touch-Up Paint: Shake the touch-up paint well to mix it thoroughly. Apply the paint in thin layers using a small brush, toothpick, or paint pen. Each layer should be allowed to dry completely before applying the next. Multiple layers may be needed to build up the paint to the level of the surrounding surface.
Drying Time: Allow the touch-up paint to dry fully, which can take several hours to overnight depending on the paint and weather conditions.
Finishing:
Wet Sand (Optional): Once the paint is dry, you can lightly wet sand the area with very fine-grit sandpaper to level the new paint with the old paint. Be careful not to sand through the new paint.
Apply Clear Coat: Apply a thin layer of clear coat over the dried touch-up paint to protect it and match the shine of the surrounding area. Let it dry completely.
Polish: After the clear coat has dried, use a fine polishing compound to blend the touch-up paint with the surrounding area. This step helps remove any sanding marks and enhances the shine.
Final Cleaning: Wipe the area with a clean microfiber cloth to remove any residue from the polishing process.
Tips:
Perform the touch-up work in a shaded, dust-free area to prevent contaminants from getting into the paint.
Be patient and take your time. Rushing the process can lead to uneven application and a less professional finish.
Store leftover touch-up paint for future use, and label it with the vehicle's color code for easy reference.
By following these steps carefully, you can effectively use touch-up paint to repair minor damages on your car, ensuring it looks good and is protected from further damage.